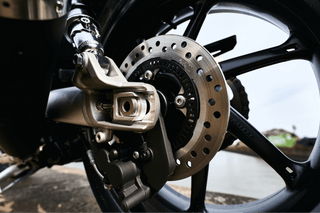
Front motorcycle master cylinder rebuild kit BC054M how to video. This is the most common front master cylinder kit used on all the Japanese brands since the early 1980's. Used by Honda, Kawasaki Suzuki and Yamaha on many different models. We use this kit on a 2004 Kawasaki ZRX1200R. Check your model for exact application but the principles used are common for all motorcycle master cylinder rebuilds.
Transcript
hello Matthew here thank you for joining us I'm back at break crafters today and after completing our inspection of the brakes on the motorcycle we're going to rebuild and reinstall a stock master cylinder on the unit and I'd like to take you through that procedure today what to look for and have it before the rebuilt service so what we have before us here is a factory besom master cylinder this is similar to or exactly the same as what came off the motorcycle it is an integral unit where the reservoir and master cylinder or what unit as opposed to remote roads where we saw the motorcycle so do a quick visual inspection here vane jumps out at me looks nice I don't see any evidence of peeling paint or bubbling paint indicating leaks that's a good sign no crash damaging like that so it's to be a good serviceable unit let's begin taking it apart yeah the first thing I like to do is take off the brake lever here so we can check out its situation there is a nut on the bottom of it that retains it [Music] that and then the pivot pin is threaded into the master cylinder so I'll have to unthread it a bit before I can push it out my hand these are notorious for getting sticky and having corrosion they put a little just a little tiny dab of grease on them at the factory it dries out moisture and the leather and stuff gets in there and we get corrosion and what-have-you and it's dry so there's often where this use here I have to give it a little bit of pressure on the unit to relieve the spring pressure to get the pin all the way out taking a look at it here not too terrible looking there's no evidence of where oftentimes you'll see literally where it's warm through the anodizing and such it is a little bit dirty so I want to clean this nicely and then of course we'll grease it wouldn't worry dissemble plate on the lever on off look carefully inside at the bushing where this pivots again this is a very high wear area you can see where sometimes just at the pivot pin sometimes just the bushing often of both on a few models this bushing is a separate piece it would push out with your fingers but on most it's pressed into the brake lever and if there was we're here with Mandy complete lever replacement you didn't you know then I've got a brake light switch underneath here we talked about this when we did the inspection on the motorcycle and I want to remove this while I'm doing the service to sure I don't damage it or break it or contaminated with fluid I would like to test it as well I can lugging it in the wire harness on the bike and trip it and see if my lights coming on if that's not an option at the moment I could put a continuity tester or old meter on here they can check it and see if the circuit is open closing these are replaceable and inexpensive it is a commonly failing component and you certainly want to have your rear brake light working for you there's that continue on I'll take the banjo bolt out happen to be left in this one couple things were looking for here it is mostly the bolt condition and two things to look at the flaps are often damaged like our bleeder screws is a relatively soft material and you can see here where it's had a 12-point wrench on it this rounded off a bit I could reuse this but I would prefer to replace it with a new unit and we do have those available the other issue you look for on older or high miles units you can get corrosion buildup from the contaminated brake fluid again that could be cleaned out but if I have a situation like that I'd rather just replace the bolt assembly for the sake of it see being washer should always be replaced any time I remove the bolt that are inexpensive and we have those available for you to break rafters as well looking at the rest of the master cylinder the sight glass looks to be in good shape here no cracks it's clean I can see inside if these are broken this will happen or if they become so it will pate that I can't see through it to the fluid level some can be replaced either by factoring around from right the components it's generally a tough thing to do if the site glass is damaged as often does not you'll want to obtain a new master cylinder core and rebuild that as I remove the couple things and see that it is installed correctly the cap should be installed with the writing facing the writer and us from this facing the right direction sometimes that actually matters for the shape of the cap other times just simply the way it's supposed to be writing and facing the writer the screws holding the camp on are often very tight for the factory in a poor fitting screwdriver will damage them they are GIS Japanese industrial standard so not all bits fit them up screws can be replaced that are inexpensive and available as needed as we remove the cap this particular example has a two-piece cap so many caps are shaped to hold the rubber diaphragm in place whereas this one has this plastic insert that shapes the diaphragm and then its thickness combined with the cap allows it to seal right away I'm noticing moisture underneath here this is not brake fluid per se this is actual moisture water and you can see it especially on top of the diaphragm here glycol-based brake fluid is hydroscopic meaning that it absorbs water naturally and this is why your manuals always tell you to always use brake fluid from a sealed container once the container has been opened it will begin to absorb moisture take my rubber diaphragm off yours doing two jobs it's of course sealing the master cylinder and the diaphragm lays on top of the fluid and it has this kind of accordion shape so as the fluid level drops it expands to fill the space we can't have any hitter in there so this looks to be in pretty good condition I certainly want to clean the moisture off of it and I want to clean the brake fluid off of it this unit is good enough to reuse although replacement is recommended from rebuilding the master cylinder and particularly if we were to see any corrosion peeling or paint coming off here this is an indication of leakage because the brake fluid is damaging paint and plastics not designed to work with it as I look inside the master so I'm just reasonably clean and that's a good sign and I do see some darkness here this is a discoloration is from the brake fluid as it's been going bad over time so I'm gonna need to clean this out and that could be just as simple as a little bit of brake cleaner and some q-tips or towels if there's heavy corrosion inside here that could require more aggressive methods a nylon or even metal bristle brush to clean it out looking inside you see that there are two holes or ports if you will a large port which is the feed and a secondary one here which is what we call your belief port or a turn circuit it's the fluid will enter the system through here and as the levers released it will cycle back through here and I'll talk a little bit more about these as we get further into it I can leave the handle bar clamp on if I want or remove it sometimes is handy to have one to something grab on to or clamp up if that should become necessary to remove the piston set first thing I've got to do is get the dust boot off in here there can be a little bit fussy there's a groove in the plunger you'll see right here okay and I'll need to get the dust boot out of that sometimes you can just pull it with your fingers and will pop out other times you got to get underneath it with a dull screwdriver a small doll pocket screwdriver is very handy for this type of thing Plus that out now we are gonna replace this so it's not critical that you maintain it you can't just dig it out with a clip if it comes down to it with a pick if that's necessary to get it out and oftentimes it is these are often dried up and see that one it is starting to split right there so that's been in it for a while here is the end of our piston we can see where the brake lever has been coming in contact with a little bit of where they're not too terribly bad on all ready units high-mileage you see what this is really dug into it and that can't affect lever feel but it's okay we're gonna get a new piston with a rebuild set down inside here is a sir clip that retains it this clip is going to be supplied with a rebuild kit so we don't have to worry about salvaging it at the same time if I break off the eyelets in the process of getting it out you can make my life really difficult give you an inner main under the clip out and these clips are notoriously diabolical get loose I need a good set of snap ring pliers here your general two hardware store type usually don't have the right shape to get down in there properly these are nice and long and come to a nice fine point locate the eyes they're in there real good make sure it's locked in you'll need to put a little bit of pressure on it with your finger to unload the clip and then it's just a matter of fighting it out and they can be a bit diabolical so you can expect to spend a minute or two here and be a little frustrated perhaps but with patience and persistence you'll eventually get it out and again you know we get a new clips if you think getting it out or lose it if it shoots across the room not a huge tragedy just be aware that you're gonna have to deal with that half of the battle is trying to see past the piston and your finger and find the eyelets to insert the tool to almost all right now let's out most of the way now I should be able to dig it out with my pick and there it comes okay there's our clip and the little eaters on it to help retain it or partly this style clip a bit of a challenge to remove here comes our piston set here I'm looking at it we have the primary seal that's moving the fluid now this is a little spiral II almost threaded looking area that helps to move fluid and just looking at it not a terribly bad shape but we do observe some corrosion here so this is what brake fluid looks like when it begins to deteriorate it first becomes kind of a gelatinous substance and it eventually crystallizes and it can be you know quite awkward to deal with so that alone to me merits the rebuild on this unit you just don't want any garbage in there and looking down inside the bore here we see there's another seal and there's a spring behind that I want to be careful I do not want to scratch the bore and sometimes this all pop out along with the with the piston set other times you'll have to work it out this is our secondary seal and our turn spring and the secondary seal is nipped into the end of the spring here so that's what that all looks like so all these parts will be are placed in the rebuilt but they all do married inspection to give us an idea what condition would be listed here